






Professional application tips with an effect paint roller
Get professional results on your walls by choosing and using the right effect paint roller. Learn which effect should be applied with a roller, trowel, or brush.
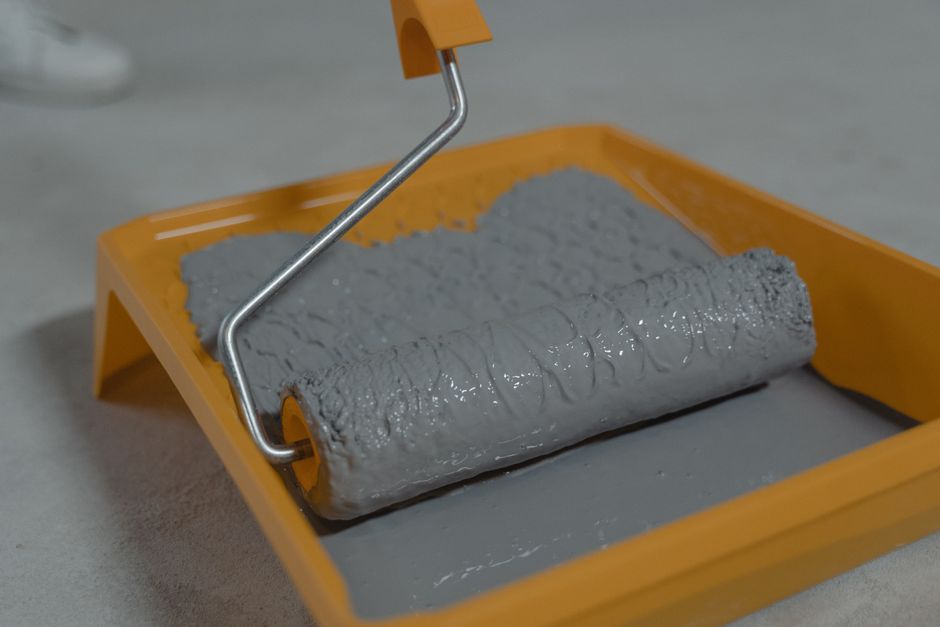
Roller, Trowel, or Brush for Effect Paint?
The most common uncertainty when applying effect paint is which tool to use. The wrong choice causes roller marks, waves, patchy surfaces, and unwanted texture. That’s why you should first clarify for which type of effect a roller makes sense, and for which a trowel or brush is essential.
Key Takeaways
- Not every effect paint is suitable for rollers; some definitely require a trowel or special tool.
- When working with a roller, surface preparation, light direction, and working speed are more decisive than the final texture itself.
- Patterned effect rollers change only the texture, not the product; the undercoats are still applied with a classic roller.
- On large surfaces, having at least two people working in sync is an advantage to avoid joints and waves.
- Roller cleaning and reuse are just as important as the first application; a dirty roller amplifies texture defects.
You can roughly think of effect products in three groups:
- Effects spread with a roller and then shaped with another tool: Many pearlescent, metallic, and fine-textured products fall into this group. For example, products such as Pearl, Pearly, Metalico, Metalico Soft, Palace, Magico, Viabella are generally distributed on the surface with a roller, then textured with different tools (brush, sponge, cloth, etc.).
- Trowel-based products that can also be worked with a roller: For thick-textured products resembling concrete, travertine, or marble, the trowel is still the main tool; however, a roller can be used as support in some stages. Betoncoat, Travertino, Marmarino Plus, Marmarito are examples of this group.
- Products that mostly require a brush or special tool: For velvet, crackle, or special textures (for example Cashmere, Velvetto, Velvetto Soft, Cracos, Decortivo, Arteco) the roller is usually used only for surface preparation or to spread the material and remove the excess; the main texture is given by a trowel, brush, sponge, or the product’s dedicated tool.
In summary:
- Creating an effect “with only a roller” is usually limited; in most products the roller serves as a distributor.
- For trowel-applied products (concrete, travertine, marble), the roller is mostly preferred for the primer and undercoat.
- For modern, lightly pearlescent surfaces, a roller + brush/sponge combination is very practical.
Types of Effect Paint Rollers and Choosing the Right Roller
Rollers used for effects differ from classic wall paint rollers in three ways: pile length, surface material, and pattern structure.
Classic Roller vs. Patterned / Texture Roller
| Roller Type | When Does It Make Sense? | Points to Note |
|---|---|---|
| Short-pile classic roller | On smooth, pearlescent, metallic, velvet-look thin effect coats | Leaves less texture, and overlap marks are easier to control. |
| Medium-pile classic roller | Undercoat, primer, and large surfaces | If used on the effect coat, it may leave a slight orange peel texture. |
| Long-pile roller | Undercoats on rough, very absorbent surfaces | Generally not recommended for effect coats; creates excessive texture and waves. |
| Patterned / texture roller | When a special texture is desired, together with a suitable product | Speed, pressure, and number of passes are critical; do not move to the main wall without a test. |
Roller Choice by Effect Type
- Pearlescent / metallic effects: For products like Pearl, Pearly, Metalico, Metalico Soft, a short-pile roller is generally preferred. The aim is to spread the product thin and evenly and to control the orientation of the metallic particles.
- Concrete effects: For products like Betoncoat, a medium-pile roller is used for the primer and undercoat, while the main concrete texture is created with tools such as a trowel and brush. A patterned roller can assist on some surfaces at a secondary level, but it is not the main texturing tool.
- Marble / travertine effects: For products such as Marmarino Plus, Marmarito, Travertino, the roller is usually used for the primer and base color; marble veining and the travertine effect are created with a trowel or special tool.
- Velvet textures: For products like Velvetto, Velvetto Soft, Cashmere, the surface is expected to look combed in a single direction. Here, the roller is used to spread the material thinly; the final touches are mostly made with a brush or special tool, pulled in a single direction.
- Crackle / patina effects: For products such as Cracos, Decortivo, Arteco, the roller usually serves only on the undercoat and intermediate coats; the effect is created with the tools specified in the product’s technical data sheet.
So when you say “effect paint roller”, you shouldn’t think of a single product, but rather a quality roller with a pile length suitable for the effect you will work with, preferably one that does not leave marks.
Surface Preparation and Primer Selection (Specific to Roller Application)
When working with a roller in effect paint, even small surface defects become highly visible depending on the light. Especially with metallic, pearlescent, and dark tones, every wave in the underlying surface becomes noticeable.
Basic Sequence for a Smooth Texture
- Identify defects: Check the wall with side lighting; mark any hollows, bulges, and cracks.
- Apply filler: To level the surface, you can use Acrylic Putty (Interior) indoors. Localized work is usually sufficient instead of covering the whole area.
- Putty primer: Stabilize the puttied areas with Putty Primer to balance absorbency.
- General primer: Depending on the surface type, you can use Interior Primer, Universal Primer, or Exposed Concrete Primer. It is particularly important to neutralize dust from the concrete, absorbency differences, and stains.
- Isolate stains: If there are stubborn stains such as nicotine, damp marks, or pen marks, stain isolation must be done with a product like İzolac before moving on to the effect coat.
- Sanding and dust removal: After the primer dries, remove imperfections with fine sandpaper and clean the dust thoroughly. If dust remains, it will clump and streak under the roller.
In particular:
- For dark color effects and metallic/pearlescent products (for example Metalico, Pearl), the time you spend on surface preparation directly determines the final look.
- On ceiling applications it is harder to hide surface defects; those considering an effect on the ceiling should dedicate more time to preliminary surface leveling.
Step-by-Step Professional Roller Application Technique
When applying effect paint with a roller, working with the same reflexes as “classic emulsion paint” often causes marks and patchy appearances. The steps below will particularly help you achieve balanced results on the second/effect coat.
1. Mixing and Consistency Control
- Stir the product from the bottom: Heavy particles inside the bucket may have settled at the bottom. Using a low-speed mixer or a clean spatula, mix from bottom to top to obtain a homogeneous mixture.
- Read the dilution recommendation: Each product has a different recommendation in its technical data sheet. For water-based effects, dilution is usually done with a small amount of water; avoid adding water “by eye”.
- Do a consistency test: When you dip the roller and roll it over the grid, the paint should neither splash off like very thin water nor remain on the roller only as clumps. For most fine effects, a slow-pouring cream-like consistency is easier to control.
2. Loading the Roller with Paint
- Dip the roller halfway: Instead of submerging it completely, dip part of the roller and roll it on the grid so it absorbs the paint evenly.
- Release excess paint: Roll the roller back and forth a few times on the grid to remove any dripping excess. This step significantly reduces dripping and heavy marks.
- Check lightly before moving to the wall: Make sure there are no dry spots on the roller; dry areas cause patchy texture on the surface.
3. First Coat: Base Color
In most effect systems, the first coat is a plain base color. This coat:
- Is generally applied with a suitable product from the interior wall paint and primer group.
- Can be applied with a classic technique (medium-pile roller).
- If chosen in a tone close to the color recommended by the product, the light–dark transitions in the effect coat will be more controlled.
4. Second Coat: Applying the Effect Coat with a Roller
- Paint the cutting edges first: Cut in wall corners, ceiling-floor junctions, and around windows with a brush. But do not do these cut lines too far in advance; complete them with the roller application within a maximum of a few minutes so no marks remain.
- Plan your work area: Imagine a large wall in vertical strips 1–1.5 m wide that you can finish at once. Each strip should blend into the previous one wet-on-wet.
- Use light pressure with the roller: The most common mistake during application is pressing too hard on the roller. This pushes paint to the sides, leaving a hollow in the middle and thickness on the edges. The roller should rotate under its own weight; guide it with your wrist, do not apply your body weight.
- Place the paint with a “W” movement, then level: First place the paint in a W or M shape, then straighten the surface with long vertical strokes. Reduce the pressure even further during these final leveling passes.
- Work with the light direction: Move parallel to the main light coming from the window, or at least in a consistent direction. This way roller marks refract the light less.
- If using a patterned roller: First spread the effect paint thinly with a classic short-pile roller and then, immediately afterwards, create the pattern with the patterned roller in a single pass. Going over the same area repeatedly will cause the pattern to blend and look dirty.
5. Continuous Work and Managing Joints
- On large walls, working with two people is advantageous if possible: one can apply the product while the other follows immediately after, leveling with a roller or creating the pattern.
- If working alone, do not divide the wall into sections. Focus on completing one wall surface in a single go, without interruptions.
- Do not go back to areas that have partially dried. Where you do, differences in sheen (matte–gloss), marks, and stains will appear.
Common Mistakes with Effect Rollers and Their Solutions
The most common mistakes in application usually do not stem from roller choice, but from poor control of pressure, speed, and drying time.
1. Roller Marks and Rippling
- Causes: Excessive pressure, inconsistent dilution, going back over a semi-dry area.
- Prevention: Use light pressure with the roller, keep a steady working speed, and plan the whole wall rather than working in small patches.
- Recovery plan: If you notice the defect while the material is still wet, you can soften the marks with a clean and slightly damp roller by passing very lightly in one direction. Once fully dry, a light intermediate sanding and a new thin effect coat may be required.
2. Patchy and Stained Appearance
- Causes: Some parts of the roller remaining dry, differences in surface absorbency, working without primer.
- Prevention: Do not skip primer before application, and make sure every part of the roller takes up paint evenly.
- Recovery plan: For minor stains, once completely dry, applying a thin “unifying coat” of the same product is usually sufficient. On very inconsistent substrates, you may need to re-prime and rebuild the effect system.
3. Orange Peel Texture and Drips
- Causes: Applying a thin effect coat with a long-pile roller, over-dilution, overloading the roller with paint.
- Prevention: Prefer a short-pile roller for thin effect products, do not exceed the recommended dilution ratio, and always release excess paint on the grid.
- Recovery plan: A light orange peel look may not be an issue in some decorative effects; if it is disturbing, you can slightly dull the surface with very fine sanding and correct it with a new thin coat.
Tips for Applying Effects with a Roller in Different Spaces
The type of space, its light, and furniture density will also affect your roller technique. The same product may require different approaches in a living room versus a bedroom.
Living Rooms and Seating Areas
- These usually have large surfaces and strong natural light; roller marks are most visible here.
- Choosing a single feature wall (with products like Palace, Pearl, Metalico) and applying a fine texture is often more controlled than covering the entire living room with the same effect.
- On large walls, two people working in sync will produce a more homogeneous result, especially with pearlescent and metallic products.
Bedrooms
- Velvet-textured products (Velvetto, Velvetto Soft, Cashmere) are frequently preferred to create a panel effect on the headboard wall.
- Here, after spreading the product thinly with a roller, a “single-direction weave” effect is created with a brush or tool pulled in one direction. The direction of roller passes should remain the same from start to finish.
Children’s Rooms and Corridors
- These are surfaces that are touched more frequently and require washability. The effect should not be too raised to make cleaning easier.
- For pearlescent, slightly metallic, and smooth-textured products, a short-pile roller with a thin application can be used, and topcoat protective systems can be considered if necessary.
Hotel Lobbies, Offices, and Commercial Spaces
- On large surfaces, joint management becomes critical; plan the area in advance before application.
- If an industrial look is desired with products such as concrete effect Betoncoat, the roller is used mostly on primer and undercoats, while the main effect is given with a trowel and tools.
- If the work schedule is tight, always consider drying times and waiting intervals between coats.
Roller Maintenance, Reuse, and Safety
After achieving a quality effect surface, if roller maintenance is neglected, it becomes difficult to get the same result on the next job. Especially with water-based effect paints, cleaning should be done quickly.
How Should You Clean the Roller?
- Start cleaning as soon as you finish: Once the paint starts to dry on the roller, it becomes very difficult to remove completely.
- Recover excess paint: Scrape off as much product as possible back into the bucket by rubbing the roller against the bucket or grid.
- Pre-wash with warm water: For water-based products, rotate the roller under warm running water to remove the first layer. You can use a neutral soap if necessary.
- Rinse thoroughly: Continue rinsing until the water runs clear.
- Dry in an upright position: Dry the roller upright, not horizontally, and preferably in a well-ventilated area. This way, the pile will not lose its shape.
How Many Times Can It Be Safely Used?
- The number of reuses depends on the roller quality, how quickly it is cleaned, and the structure of the product you worked with.
- With metallic and pearlescent products, if the roller’s pile starts to harden and leave marks over time, it is safer to continue with a new roller.
- If you have worked with thick-textured products and the material has hardened and settled inside the roller, replacing the roller will usually compensate for the time and labor loss.
Work Safety and Floor Protection
- Since effect paints generally contain more intense pigments and binders, splashes are harder to clean than with classic wall paint. Protect floors and furniture with coverings in advance.
- Use masking tape to cover skirting boards and door-window frames; roller splashes usually travel farther than you expect.
- Pay attention to ladder and scaffold safety when working on ceilings and high walls; avoid working on damp, slippery floors.
Next Step: Start with a Small Test Area
When working with an effect paint roller, the best way to turn theoretical knowledge into practice is first to create a small test surface. Prepare the correct primer and undercoats for your selected Silkcoat effect product according to its technical data sheet, determine the appropriate roller type, and do a trial on an inconspicuous section of the wall or on a separate panel.
This small test allows you to check your dilution ratio, working speed, pressure, and team size under real conditions. If you are satisfied with the test, you can apply the same sequence and technique exactly on the main area to obtain more balanced, professional-looking effect walls.
An effect paint roller is preferred especially to spread pearlescent, metallic, and fine-textured products evenly over the surface. For thick-textured concrete, travertine, or marble effects, it is generally used only on primer and undercoats.
For fine, pearlescent, and metallic effects, it is ideal to spread the product with a roller and then create the effect with a brush or sponge. For thick textures such as concrete and travertine, the main tool is the trowel, while velvet and crackle effects generally rely on brushes and special tools.
Patterned effect rollers change only the texture, not the product itself, and are generally used during the final effect coat. Undercoats are applied with a classic roller; speed, pressure, and number of passes must be adjusted with a prior test.
Surface preparation, light direction, working speed, and management of overlaps are key points. On large surfaces, two people working in sync reduce the risk of waves and marks; avoid using a dirty roller.
On well-prepared, smooth interior walls, an effect paint roller provides even distribution. On very rough or highly absorbent surfaces, the roller is mostly preferred for primer and undercoats, and additional tools are required for the effect.
The duration depends on the surface area, product type, and tools used. Thin coats that are spread with a roller and then textured with a brush or sponge generally progress faster, whereas thick textures applied with a trowel require more time and drying intervals.
As soon as the application is finished, the roller should be thoroughly cleaned with the appropriate solvent or water, as recommended by the manufacturer. Rollers that are completely cleaned and maintain their form can be reused; dirty rollers, however, will amplify texture defects.
On large surfaces, it is important to work in continuous strips, wet-on-wet. If possible, two people should progress in sync, keep the overlap areas parallel to the light direction, and maintain consistent roller pressure across the entire surface.